
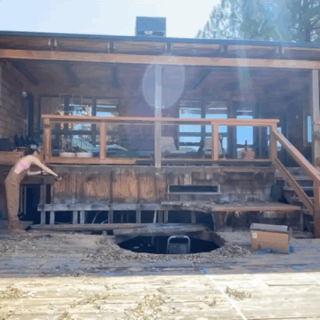
Demolition
PORCH RENOVATION
I learn so much from demolition in the process of deconstructing and uncovering the craftsmanship of something that was assembled in the past. I’ve uncovered examples of “what to do”, details that lasted decades and will last for decades more; as well as “what not to do”, details that caused failures well before due lifespan. Beyond that, I find a therapeutic quality to demolition - it’s an incredible workout and the transition to a clean canvas is extremely satisfying.
I won't be diving into the nitty-gritty of how I demolished each aspect of this project since each demolition project is its own unique challenge. Instead, I’ve compiled a list of trusty tools that have become my go-to companions, along with some information on how I used them on this project. As a smaller individual with not-so-impressive physical strength, tools are the MVP’s when I’m trying to do-it-myself.
Tools used for demolition

PERSONAL PROTECTION EQUIPMENT (PPE) AND SAFETY: Wear your PPE! Building things (or unbuilding things in this case) and using tools are dangerous activities. Always make sure you are taking preventative safety measures for all activities and engage in proper training prior to using any tools. This blog is for inspirational purposes only, not to be construed as professional advice or training.
WRECKING BAR: I use this for leveraging things apart - also sometimes called a “crowbar”, “pry bar”, “ripping bar”, “handy bar” or “demolition bar”. Each of these have slight design differences but all fall under the same category of tools. Wrecking bars come in a number of different sizes, we have probably 5 or 6 different wrecking bars, but there are 3 sizes that I use most often:
21-inch Handy Bar: When tackling smaller items, navigating tight spaces, or separating tight joints to create more room for the larger wrecking bars, I prefer using a 21-inch Handy Bar. We have the ESTWING Handy Bar Nail Puller - 21" Pry Bar with Wide, Thin Blade & Forged Steel Construction - HB-21
18-inch & 36-inch Ripping Bar: I often use these two sizes of wrecking bars interchangeably, but if I have a choice, I lean towards the 36-inch Ripping Bar. It's not too heavy and offers better leverage due to its length, making it more effective for separating materials with less effort. Additionally, it also seems to extract longer, rusted nails (3 inches or longer) from boards more efficiently than the smaller bars.
The decision on which size to use is usually driven by the available clearance space for fitting the wrecking bar.
The Stanley 55-118 18 Inch Wrecking Bar & 36 in Forged Hexagonal Steel Ripping Bar are similar products to the ones we have (ours are older versions of these) . One feature I’d recommend considering when selecting a wrecking bar is the degree of bend of the bar. I personally prefer having a 180-degree bend on one side for an extended range of leverage.
NAIL PULLER: I use a nail puller in combination with a hammer to extract nails that are less than 3 inches in length or to expose the heads of longer nails to make them accessible for the wrecking bar. They come in many different types and sizes - there are Pincer Pliers, Puller Pliers, Cat’s Paws and Air Punches.
Cats Paw: The nail puller model that we have is an 11-inch “J” shaped Cats Paw - the specific make/model has been discontinued.
The ESTWING Nail Puller - 12" Double-Ended Pry Bar with Straight & Wedge Claw End is pretty similar in design to the one we have.
Other types: If you’re doing something that requires a lot of meticulous nail removal, you may benefit from diving deeper into the different types of nail pullers out there to find what would work best for your circumstance. If you’re trying to salvage material, I could see a benefit to another type of puller to minimize distress to your materials. With stubborn nails, there are sometimes blemishes that occur around the nail removal site with the cats paw style puller that we have.
SLEDGE HAMMER: When I encounter stubborn connections that need a little extra force, I’ll use a sledge hammer. Sledge hammers are available in various weights and sizes. Depending on the force required, I use either a large or a small hammer, below are the two I use:
4 lb. Sledge Hammer with 16-inch Handle: I use this more during the construction phase than during demolition. However, it came in handy when I needed just a little extra oomph to dislodge something.
We have the 4 lb. Engineer Hammer with 16 in. Hickory Handle from Home Depot.
10 lb. Sledge Hammer with 36-inch Handle: For tougher connections that just won’t budge (and when I’m not trying to salvage material), a well-aimed blow (or blows) from this larger sledge hammer usually does the trick to separate pieces.
We have the 10 lb. Sledge Hammer with 36 in. Hickory Handle from Home Depot
General note: handles can be made from different materials. I personally prefer a wooden handle. I recently bought a 4 lb. sledge with a fiberglass handle and rubber grip thinking it would be a more comfortable hold, but I found it didn't suit me at all. Since it’s likely a matter of personal preference, it may be something worth trialing before purchase if you can. The 4 lb. hammer is one of my favorite go-to’s when I’m building things so having one that I like is important to me.
SAWS: Sometimes we needed to cut wood in place – there were two tools that I used for these tasks:
Cordless Chainsaw: During the demolition of this project, I encountered some large wood beams that were beyond salvage. This is where a chainsaw came in handy - enabling me to cut massive beams into smaller, more manageable pieces.
We have the BLACK+DECKER 20V MAX Chainsaw Kit, Cordless, 10 inch, Tool-Free Chain Tensioning, Oil Lubrication System, Battery and Charger Included (LCS1020), We have this primarily for the occasional tree maintenance tasks - since we don’t have a great need for a high powered chainsaw, this one offers sufficient power for our needs and comes at an attractive price point. What I like in particular about this chainsaw is its lightweight design - making it easy to handle. I’ll note that occasionally, the chain comes off, but reattaching it is a pretty straightforward process.
Zaw Saw: Also known as a "reciprocating saw", this tool offers a higher degree of precision when cutting wood compared to a chainsaw. With certain blades, it can also cut through nails. We used it in situations where we needed to detach beams somewhat surgically from their connections. It's slender, projecting blade allows it to cut between pieces of wood that are fastened together.
Currently, we have an older corded saw - I'm not particularly fond of this specific make and model. For my stature, it feels somewhat bulky and cumbersome and is pretty heavy.
We've recently upgraded to a Dewalt saw, I’m excited about this because it boasts a smaller and lighter build – the link will lead you the DEWALT 20V MAX XR Reciprocating Saw, Cordless, 2-Finger Variable Trigger, Keyless Blade Clamp, Bare Tool Only (DCS382B).
BOLT CUTTER: These tools are handy for cutting through wire mesh, nails, screws, and severely deteriorated bolts. When I want to extract fasteners from wood pieces that I intend to reuse, I’ll cut one side of the nail or screw and use a hammer to either pry (if I left the nail/screw head on) or drive the fastener out (if I cut off the head). I've found that this approach is cleaner than immediately prying the fastener - prying will sometimes widen the hole / rip / blemish the wood. Again, there are different types and sizes of bolt cutters, below is the one I like to use:
14-inch Bolt Cutter: This is my one-stop tool for cutting fasteners. Compared to a smaller cutter, the 14-inch arm length provides me with more leverage from less effort. I also appreciate the distance between me and the object I'm cutting since the objects often choose their own trajectory after they’re cut. Regardless of tool– this is a good reminder to wear eye protection.
Once again, the bolt cutter we have is so old there are no brand markings, the WORKPRO W017004A Bolt Cutter, Bi-Material Handle with Soft Rubber Grip, 14", Red&Blue is very similar in design to the one we have.
Hope this information is helpful!